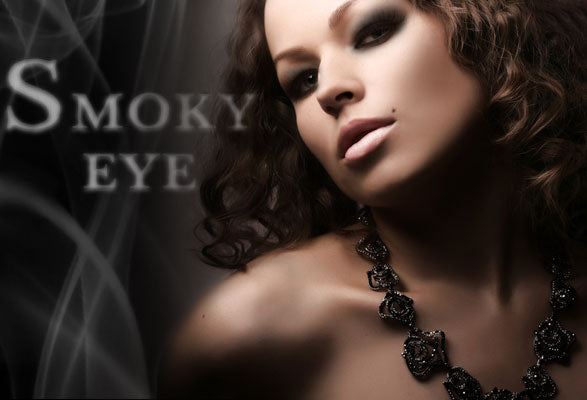
Everyting you’ve always wanted to know about the smoky eye
This is probably one of the most difficult looks to achieve. And what’s more, it’s really popular right now, especially during the party season when we all want a glamorous look. But don’t panic, I’ve prepared a list with a few tips to make it easier for you. Then I’ll show you, step by step, how to get the look.
Start with the base
I know I always insist on this but there’s a good reason. When you’ve tried an eye shadow base, you wonder how you ever did without it for so long. Not only will your smoky eye probably stay intact a lot longer but it’ll also be more opaque and you won’t have to apply so much. There are lots of eye shadow bases on the market at all price ranges.
Start with a creamy pencil
The basic smoky eye technique consists of lining all around the eye with pencil eyeliner, black more often than not. But if your pencil is dry, the effect will be sketchy, uneven and it won’t blend properly. The creamier the pencil, the easier it is to blend. There are many eyeliner pencils designed specifically for blending and some even have a rubber blending tip on one end
Begin with the dark shadow and finish with the light
Many people make the mistake of applying the pale shadow under the brow bone, before the dark shadow which goes around the eye up to the crease. But if you do it the other way round, it’ll be a lot easier to adjust the blending effect by adding the light shade (usually beige, ivory or white) last. The transition between the dark and the light will practically occur naturally.
Use several shades of the same colour for smoky eyes
If you use several shades of the same colour (from the lightest to the darkest); the gradation will be easier to achieve. So you should get light grey, dark grey, charcoal and black. You can then apply each shade in steps and you’ll have a great effect, ending with light beige, ivory or peach.
Use the right tools
To create a nice gradation, you need good brushes. Just as a carpenter can’t craft a piece of furniture without the right tools, you can’t create a smoky eye with the tiny sponge-tip applicators that come with the eye shadow! If you get yourself a sponge applicator with a long handle, a round soft-bristled brush, a wide flat brush for blending and a very fine one for the eye contour, you’ll realise that you’re more skilful than you thought!
Don’t hesitate to use these tools a lot: blend, blend, and blend some more! That’s how you get the nice gradation.
It’s better to add than subtract
Always begin with a small quantity of eye shadow and intensify it little by little, gradually darkening it and adding layers gradually. Remember it’s always easier to add some eye shadow than to remove it.
Finish with eyeliner and lots of mascara
To look good, the smoky eye must have a nice finish. To get this, outline the eye with a pencil in a matching colour (and if it suits you, a line of kohl inside the eye gives a lot of radiance and character to this style of makeup) and end with several coats of black mascara. A smoky eye without mascara looks incomplete. Don’t hesitate to use a volumizing mascara which stands out or why not go for false lashes?
Begin your makeup with the eyes, not the face, but don’t neglect your complexion!
Usually, you begin with the face makeup but for a smoky eye, it’ll make your task easier if you begin with the eyes and finish the rest afterwards. That way, if you make a mess with a smudge of grey shadow on your face, you won’t have to start all over again.
And watch out, a smoky eye look without foundation or concealer can be an absolute disaster. The smoky eye look emphasises your under eye dark circles. So get yourself a good concealer and apply it after the eye shadow, The same goes for redness, A good foundation will let your eyes be the star and not your little imperfections. Don’t forget a good bronzing powder or blush because a dark smoky eye with a pale complexion can give you a gothic look (unless that’s the effect you’re aiming for!).
All in all, the smoky look shouldn’t be confined to the eyes but should be part of a complete look. And don’t forget the lips. The best look is the nude lip.

Smoky Eye technique
Step 1

Begin by applying an eye shadow base to intensify the colour and make it last longer.
Step 2

Line your eyes with a creamy black pencil. Begin at the outer corner of the eye and make small marks towards the inner corner. Then draw the line on the upper and lower lids. Draw a fairly thick line so that when blended, it looks fuzzy.
Step 3

With a sponge applicator or your finger, smudge the line so that it looks blended.
Step 4

Use a grey or charcoal shadow for a more dramatic effect but in fact you can use any colour for a smoky eye. Try plum, blue or brown. And match your pencil to your eye shadow. A dark plum pencil will be great with a plum shadow or a navy pencil with a blue shadow and so on. It’ll look great!
The smoky effect will be easier to achieve with a fairly wide, dense brush such as the #224 by M.A.C, #13 by Lancôme, #13 by Sephora , Eye Smudge Brush by Bobbi Brown or Definition Brush by Lise Watier.
Before applying the dark eye shadow, I would advise you to protect the under eye area with a large quantity of loose powder that you can brush off when the makeup is finished. That way, you won’t have to start all over again and re-apply concealer because your under-eye area is black!
Apply the charcoal shadow, over the eye liner from the root of the lashes to the crease (under the brow bone). Apply the shadow with the brush when the eye is open, looking directly into the mirror.
Continue to blend the shadow with brush strokes. You can apply more shadow near the eye and blend gently outwards and upwards so that the quantity is diminished. The smoky eye should start out dark but gradually grow paler. You could also apply the eye shadow over the eyeliner. The effect will be more intense and will last longer.
You could also add a layer of ivory shadow to the dark line of shadow and this will intensify the blended effect.
Step 5

With a brush, apply an ivory shadow (not too white; a warm pinkish beige is better) on the upper eyelid, from the brow bone to the eyelid crease (where the dark shadow stops) and blend well.
Step 6

Line your eyes with eyeliner or pencil on the upper and lower lashes too if you wish.
Step 7

Line your inner lids (upper and lower or only lower if you have medium to small eyes) with a black kohl pencil (kohl is designed specially to be applied inside the eye, on the waterline). You’ll get a really sexy look. I recommend using kohl powder that you apply in one stroke, keeping the eye closed . An excellent product: Guerlain Terracotta Khol (loose powder khol).
Step 8

When you have a more heavily made-yup look, it’s essential to intensify the eyebrows with a pencil or a brow powder, Choose a colour to match your hair.
Step 9

Apply several coats of black lengthening and volumizing mascara (choose a “carbon black” mascara) on your upper and lower lashes to maximize the glamourous look! If you want to go all out, get false lashes. Use sections of lashes, they’re easier to apply than the traditional fringe and they’re more realistic. Use a few long ones near the outer corner of the eye and pout like Marilyn. If you use false lashes, apply them before the mascara and eyeliner. You’ll be irresistible!
So now, you know all about the smoky eyes, you’ll just have to practice…