How to get the natural look with makeup
This is probably the most popular makeup look. It’s the most versatile, goes with all outfits, and is the most flattering look for most faces. It’s also very easy to achieve and doesn’t require a lot of knowledge about applying makeup. So it’s ideal for a beginner, for someone who doesn’t like to wear makeup but even so wants to look good, for a wedding or for work.
The aim is to make the most of your features without looking too made-up. People will tell you that you look pretty and not that your makeup is well-done. That’s what most of us want to hear.
As usual, we’ll begin with the complexion. As you want a natural look, use a light to medium coverage foundation which has a satiny or luminous finish (like a second skin).
You can use powder to set the foundation but go easy. If you apply too much powder, your skin will look ashy and frankly, you’ll look older as the powder will accentuate wrinkles and even create wrinkles where there aren’t any!
Here’s a tip to avoid too much powder or foundation. Do this step in front of a big window. There’s nothing better than natural light for applying makeup!
Shopping List
-ivory/ beige eye shadow, mat or satin finish, not too pale, not too yellow.
-taupe or brown eye shadow, mat or satin finish, light to medium intensity.
-taupe or brown eyeliner pencil. I like creamy-textured pencils which blend easier and glide onto the skin without having to press too hard.
-defining mascara (which separates lashes for a more natural look), brown or black.
-blush and a brush, neutral colour, not too brown, not too pink.
-semi-transparent creamy lipstick in a beige or light pink shade or a transparent beige or pink gloss.
-a soft natural-bristle medium-size eye shadow brush and a sponge-tip applicator.
Step 1)

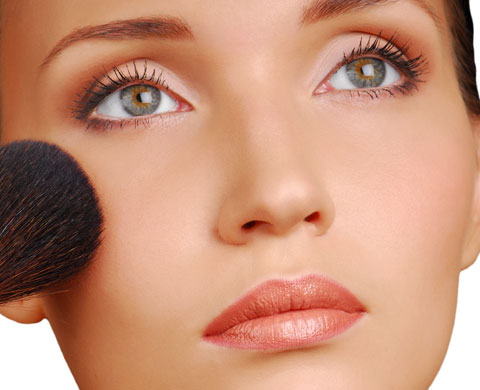
Begin with the blush. A natural blush should make you look as though you’ve just come in from the fresh air and should not be too obvious. So smile, your mirror will love you even more! This is the best way to apply blush. Dip your brush in the powder and then shake off the excess before applying it so that you don’t get streaks. Make circular movements on the apples of your cheeks and extend it upwards towards the temples.
Step 2)

For the eyes, apply the pale shadow over the whole lid (from the lashes to the brow) with the sponge-tip applicator. This will give you a nice powder base that’ll help you with the next step.
Step 3)

With the brush, apply the taupe shadow in the hollow under the brow bone starting at the outer corner and ending in the centre. You can take a large soft brush and place it in the hollow, keeping your eye open, and draw a soft arch. It’ll blend in quite naturally.
Step 4)

Now line your eyes with the pencil. If you have really big or round eyes, don’t line under the eyes. You’ll look like a fish. Otherwise go ahead and line under the eye. It’ll make your eyes look bigger. The line should be soft and end gradually opposite the middle of the iris.
Begin at the outer corner of the eye and make small guide marks (like painting by numbers), gradually tapering off towards the centre of the eye. Don’t pull your eyelid with your fingers, it’ll make your line uneven and won’t flatter the shape of your eye. You can then blend the line with a sponge-tip applicator, an eyeliner brush or your finger.
Step 5)

Apply two coats of defining mascara. You could also curl your lashes first as this will help to make your eyes look bigger. Start at the root and use a zigzag movement. The brush will penetrate the lashes better this way. Let them dry briefly between coats (a few seconds). The effect will be more visible.
Step 6)

You could apply lipstick or gloss with a brush for a more precise application and more opacity. A lip-liner pencil is a good idea too. It should be the same colour as your lips or half a shade deeper than their natural colour.